Followers

Showing posts with label Bracket Label punch. Show all posts

January 30, 2017

Thanks for being YOU!

Hi everyone,

Thanks for stopping by and for all your wonderful comments. I'm honored to have you here and I truly appreciate each of you more than you know!

I know, after promising that you'd seen the last one layer card for a while, I've got another card featuring two of the stamp sets that were used in those sets, but this isn't a one layer, AND there's a welcome return of another of my favorites, butterflies...


Card: Wisteria Wonder, Rich Razzleberry and Whisper White
Ink: Wisteria Wonder (ink and Stampin' Write marker) and Rich Razzleberry
Stamp sets: Timeless Textures and Me = Grateful
Tools and embellishments: Elegant Butterfly, Bitty Butterfly and Bracket Label punches (latter retired); Basic Rhinestones and extras from my stash
Adhesives: Tombow and Stampin' Dimensionals

Challenges...
#265-266 AAG at Pixie's Snippets Playground
#266-267 AAG at Word Art Wednesday
#226 AG at Addicted to Stamps and More

I'll be back on Wednesday with my latest DT creation for House of Cards, and another post, so I hope you'll join me then.


October 28, 2016

Thanks For Being You

Hi everyone,

Thanks for stopping by and for all your wonderful comments.  I'm honored to have you here and I truly appreciate each of you more than you know!

Confession time: the card I'm sharing with you today has been in a time warp for months!  I created it back in April, but only realized I'd not blogged it when I was scheduling another creation using Timeless Textures and Blogger didn't recognize the label as one I'd previously used.  A search of the blog and my pc files drew a blank, but after searching a Facebook group, where I knew I'd posted it, I realized I wasn't going mad and HAD created the card...


Card: Whisper White and scraps of Wisteria Wonder
Ink: Smoky Slate, Memento Black and Wisteria Wonder Stampin' Write marker
Stamp sets: Timeless Textures and Me = Grateful
Tools and embellishments: Bracket Label punch (retired), Bitty Butterfly punch and Basic Rhinestones
Adhesives: Tombow and Stampin' Dimensionals

Challenges...
#335 AAG at Craft your passion
#133 AAG at crafting from the heart
#95 AG at Crafty Gals Corner

Whatever you're doing this weekend, have a great one.  I'll be back on Tuesday with my latest DT creation for House of Cards, so I hope you'll join me then.


September 6, 2015

Faux Stitching Tips for House of Cards

Hi everyone,

Thanks for stopping by and for all your wonderful comments. I'm honored to have you here and I truly appreciate each of you more than you know!

I'm honored to be representing House of Cards Team 2 and bringing you a tip on behalf of the team for our current challenge, Stitch It Up. Please do check out the group post here.

Border stamps are great for adding faux stitching to your project. They are quick and easy to use and aren't just for around the edges, they can be used to create great backgrounds too! Here I've used the same stamp set, Bohemian Borders from Stampin' Up!, as in my original card (see below for that one), to give you another example of how they can be used...

There are a couple others in the set that would work really well as frames and I'll be sharing another card with you, using those images, later in the month.


Card: Whisper White and Crumb Cake
Ink: Tempting Turquoise and Rich Razzleberry
Stamp sets: Bohemian Borders and Tag Talk
Tools: Bracket Label Punch
Adhesives: Tear & Tape and Stampin' Dimensionals

Original card, posted September 1st...

Challenges for today's card...
#199 AAG at Word Art Wednesday

I'll be back tomorrow with another creation, so I hope you'll join me then.


September 1, 2015

Faux Stitching for House of Cards

Hi everyone,

Thanks for stopping by and for all your wonderful comments. I'm honored to have you here and I truly appreciate each of you more than you know!

The card I'm sharing with you today is my DT offering for the latest challenge over at House of Cards. Our theme this month is...


You can use either real or faux stitching on your project and I immediately knew that the Bohemian Borders stamp set from Stampin' Up! would be perfect for the job!


Card: Crumb Cake and Whisper White
Ink: Rich Razzleberry and Tempting Turquoise
Stamp sets: Bohemian Borders and Tag talk
Tools: Bracket Label punch
Adhesives: Tear & Tape and Stampin' Dimensionals

Challenges...
#198 AAG at Word Art Wednesday
#192 AAG at Pixie's Snippets Playground
#277 AAG at Craft your passion
#34 Lots of layers at Crafty Gals Corner

I'll be back on Friday with another creation, so I hope you'll join me then.


August 24, 2015

Scrappy Birthday

Hi everyone,

Thanks for stopping by and for all your wonderful comments. I'm honored to have you here and I truly appreciate each of you more than you know!

Ever wonder what to do with all the thin offcuts you get when creating the mats for your cards? Do you even keep them? It might not surprise you to learn that I keep all mine. Originally it was with the hope of using them for sentiments, but now I've found an even better use for them; as the focal point and design on your cards...


Card: Whisper White, Pear Pizzazz and lots of snippets of Lost Lagoon
Ink: Pear Pizzazz and Lost Lagoon
Stamp set: Tag Talk
Tools: Bracket Label Punch
Adhesive: Fast Fuse and Stampin' Dimensionals

Challenges...
Paper Piecing at Night - Shift - Stamping
#162 Happy Birthday at DL.ART
#197 AAG at Word Art Wednesday
#191 AAG at Pixie's Snippets Playground
#238 Sketch at Less is More

I'll be back on Wednesday with another creation, so I hope you'll join me then.


May 18, 2015

Coffee & Friends TRULY are the Perfect Blend

Hi everyone,

Thanks for stopping by and for all your wonderful comments. I'm honored to have you here and I truly appreciate each of you more than you know!

Did you miss me? I sure missed each of you! I had a really relaxing vacation and attending the Stampin' Up! Regional in Telford on Saturday was the perfect ending to my time off!

The card, or rather card front, that I'm sharing with you is the swap I created for the event. Regular readers will know how much I absolutely LOVE the Perfect Blend stamp set and I was gutted when I saw it on the retiring list. I'd got the set in my starter kit when I joined SU and with Telford being my first event, I decided to use it anyway. I made 60 swaps and also added a cup to my name badge, so I fussy cut 121 cups, lids and wraps! Cutting and putting them together took over 7 hours, but it was WELL worth it...


Card: Pear Pizzazz, Pistachio Pudding, Very Vanilla and Crumb Cake
Ink: Early Espresso, Pear Pizzazz, Crumb Cake
Stamp sets: Perfect Blend and Gorgeous Grunge
Tools and embellishments: Petite Petals, Bracket Label and Decorative Label punches and Basic Rhinestones

Challenges...
#183 AAG at Word Art Wednesday
#177 AAG at Pixie's Snippets Playground
#60 AAG at Crafting From The Heart

Coffee and friends TRULY are the perfect blend and here's a pic of me and my beautiful Stampin' Sister Yvonne. We both had the best day and I can't wait to see her again soon!


Most of the products I've used for today's creation are available 24/7 in my Online Shop. Click the images below to be taken straight to them.

Built for Free Using: My Stampin Blog

I'll be back on Wednesday with more pix from Telford, so I hope you'll join me then.

Hugs,
Em

March 5, 2015

Baby Girl

Hi everyone,

Thanks for stopping by and for all your wonderful comments. I'm honored to have you here and I truly appreciate each of you more than you know!

So far this week I've shared a sweet girl, cute boy and sweet baby cards, but I think it's always a great idea to have a few different designs in your stash, so today I'm bringing you another baby girl card using the adorable shoes image from the Baby We've Grown stamp set from Stampin' Up! and teaming it with a sentiment from another stamp set in the annual catalog, Celebrate Baby...


Card: Whisper White
Ink: Blushing Bride
Stamp Sets: Baby We've Grown, Celebrate Baby and Best Day Ever (Available FREE during Sale-A-Bration when you spend £45 or more until March 31)
Tools and embellishments: Labels Collection framelits, Bracket Label Punch, Basic Rhinestones, Stamping Sponges and Stampin' Dimensionals

Stamp the small heart from Best Day Ever randomly in Blushing Bride ink over the front of a folded Whisper White card
Stamp the shoe image from Baby We've Grown onto a snippet of Whisper White and the sentiment from Celebrate Baby in the same ink onto more Whisper White
Cut sentiment using the third smallest Labels Collection framelit die and punch the image using the Bracket Label punch.
Sponge Blushing Bride ink around the edges of both and attach to the card base with Stampin' Dimesionals.
Add a touch of bling with a few Basic Rhinestones on the shoes and sentiment

Challenges...
#173 at Word Art Wednesday
#166 AG at Pixie's Snippet's Playground
AG at Clear It Out

All the products I've used for today's creation are available 24/7 in my Online Shop. Click the images below to be taken straight to them.

Built for Free Using: My Stampin Blog

I'll be back tomorrow with another new baby creation, so I hope you'll join me then.

Hugs,
Em

February 26, 2015

Diagonal Gate Fold With Love Is Kindness

Hi everyone,

Thanks for stopping by and for all your wonderful comments. I'm honored to have you here and I truly appreciate each of you more than you know!

Today's card is not only the fourth created this week with the gorgeous tulips from the Love Is Kindness stamp set from Stampin' Up!, it's another fancy fold too. If you've missed any of the other LIK cards, click on the days and they will open in another tab: Monday, Tuesday, Wednesday.

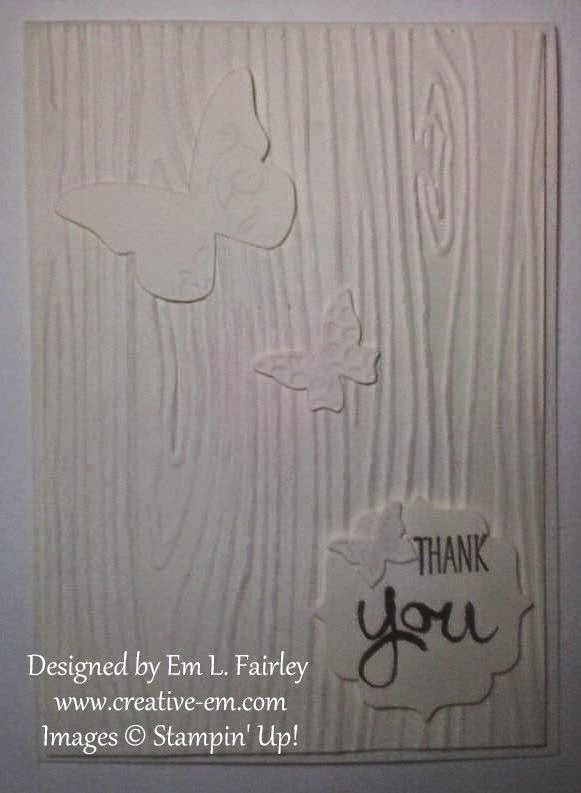
The card looks great on the outside...

And on the inside too...

Card; Crumb Cake (two 5" x 10" and a 4'' square), Whisper White (3 6/8" square plus extra snippets), Coastal Cabana, Very Vanilla (snippet), and Best Year Ever DSP (two 4 3/4" squares)
Ink: Memento Black
Markers: Wild Wasabi and Bermuda Bay Blendies
Stamp Set: Love Is Kindness
Tools: Bracket Label punch, Basic Pearls and Stampin' Dimensionals

Score both 5" x 10" pieces of Crumb Cake card at 5", then cut diagonally from the score line out to the corner. Turn one if necessary and adhere the squares together to create the gate fold base.
Cut one of the 4 3/4" Best Year Ever DSP squares in half diagonally and adhere to the front of the card. Attach the other square inside the card.
Stamp the image from the Love Is Kindness stamp set in Memento Black ink onto Whisper White, the flowers onto the snippet of Whisper White and the newspaper wrap onto the snippet of Very Vanilla.
Color the complete image with Wild Wasabi and Bermuda Bay blendies, and the extra flowers and 6 pearls with the Bermuda Bay blendies.
Attach the stamped panel to the 4" Crumb Cake square and attach the panel carefully to one side of the gate fold.
Cut the newspaper wrap and adhere to the complete image. Cut the extra flowers and decoupage onto the image with half a Stampin' Dimensional.
Stamp the sentiment in Memento Black onto Whisper White, punch with the Bracket Label punch and layer onto two punched from Coastal Cabana card. Pop up using Stampin' Dimensionals.
Add the colored Basic Pearls to complete the card

Challenges...

#58 Designers Choice at CYCI
AG #13 at Simon Says Wednesday Challenge
#8 Fancy Folds at Crafty Gals Corner

All the products I've used for today's creation are available 24/7 in my Online Shop. Click the images below to be taken straight to them. 
Built for Free Using: My Stampin Blog


I'll be back tomorrow with the last of this week's Love Is Kindness creations. It's a really special show stopper, so I hope you'll join me then.

Hugs,
Em

February 25, 2015

Twisted Easel With Love Is Kindness

Hi everyone,

Thanks for stopping by and for all your wonderful comments. I'm honored to have you here and I truly appreciate each of you more than you know!

Today's card is another I've created with the gorgeous tulip image from the Love Is Kindness stamp set from Stampin' Up. It's also a twist on Monday's easel card. If click you missed that one or Tuesday's, click on the days so they will open in another tab.


The twisted easel is just as easy to create as the standard easel and looks even more stunning...

Card: Pear Pizzazz (10" x 5", 5" square, 2½" x 4" for layering and snippet for punching), Hello Honey (2¼" x 3 3/4"), Very Vanilla (2" x 3½" and snippet for punching), Best Year Ever DSP (two 4 3/4" squares) and Whisper White (snippet for newspaper wrap)
Ink: Memento Black and Hello Honey
Markers: Daffodil Delight and Wild Wasabi Blendies
Stamp Sets: Love Is Kindness and Indescribable Gift (sentiment)
Tools: Bracket Label Punch and Stampin' Dimensionals

To create the base card, score and fold the 10" x 5" piece of Pear Pizzazz card at 5", then from one end of that line to the corner diagonally opposite. Attach Best Year Ever DSP to the inside square and the 5" square.
Stamp the tulip image onto Very Vanilla card and color with Daffodil Delight and Wild Wasabi blendies.
Stamp the image onto Whisper White. Cut out the newspaper wrap and attach to the colored image.
Layer the stamped panel onto the Hello Honey and Pear Pizzazz pieces and attach to the DSP covered square.
Fold the card along the middle score line and attach the 5" square of Pear Pizzazz to the base by putting adhesive on the outer triangle and lining up.
Stamp the sentiment from the Indescribable Gift stamp set onto Very Vanilla in Hello Honey ink. Punch out with the Bracket Label punch and punch another from Pear Pizzazz card. Cut the Pear Pizzazz piece in half and attach to the back of the sentiment. Trim the points from the top and bottom and pop up onto the inside of the card with Stampin' Dimensionals to create the stopper for the easel.

Challenges...

#58 Designers Choice at CYCI
#172 AG at Word Art Wednesday
#165 at Pixie's Snippets Playground

All the products I've used for today's creation are available 24/7 in my Online Shop. Click the images below to be taken straight to them. 
Built for Free Using: My Stampin Blog


I'll be back tomorrow with another Love Is Kindness creation, so I hope you'll join me then.

Hugs,
Em

February 17, 2015

Word Art Week You Made My Day

Hi everyone,

Thanks for stopping by and for all your wonderful comments. I'm honored to have you here and I truly appreciate each of you more than you know!

Welcome to the second day of Word Art Week, where the sentiment is the star. If you missed yesterday's creation, you can see it here.

For today's card I've used another of the stamp sets, Best Day Ever, available FREE from Stampin' Up when you spend over £45 during Sale-A-Bration, as well as the coordinating DSP pack, Best Year Ever, which is another S-A-B item. The card took just a few minutes to make and I love the look...


Card; Whisper White (folded base and a snippet for stamping), Coastal Cabana and Best Year Ever DSP
Ink: Coastal Cabana
Stamp set: Best Day Ever
Tools: Bracket label punch

Cut and fold your card base from Whisper White card. Cut your DSP panel (I cut mine ¼" smaller than the base) and attach to base card.
Stamp sentiment from Best Day Ever stamp set in Coastal Cabana ink onto Whisper White. Punch out with Bracket Label Punch. Punch another from Coastal Cabana card, cut in half and layer behind sentiment. Attack to base with Stampin' Dimensionals

Challenges...
#52 Chevrons at CAS on Sunday
AG at Through The Craft Room Door

All the products I've used to create today's card are available 24/7 in my Online Shop. Click the images below to be taken straight to them

Built for Free Using: My Stampin Blog


I'll be back tomorrow with another Word Art Week creation, and it's a special day, so I hope you'll join me then.

Hugs,
Em 

February 6, 2015

Painted Petals Thank You!

Hi everyone,

Thanks for stopping by and for all your wonderful comments! I'm honored to have you here and I truly appreciate each of you more than you know!

Today's card is a Thank you I've created with Painted Petals and I want to thank each of you for sharing this week with me...


Card: Whisper White (card base, panel and a snippet for stamping) and Coastal Cabana
Ink: Tempting Turquoise
Markers: Coastal Cabana Blendabilities
Die: Butterfly Thinlits
Tools and embellishments: Bracket Label Punch, Basics Pearls (colored with blendies), Mini Glue Dots and Stampin' Dimensionals

Stamp the flower head in Tempting Turquoise multiple times onto the Whisper White panel as desired (I didn't reink until faded) to create the background. Attach to folded base.
Cut the medium butterfly from Coastal Cabana card and attach to base with a couple Mini Glue Dots.
Color 5 pearls with the Coastal Cabana blendies (I used the darkest shade) and allow to dry.
Stamp the sentiment in Tempting Turquoise onto Whisper White and punch out with the Bracket Label punch. Punch another from Coastal Cabana card. Pop up onto the base with Stampin' Dimensionals and offset the top one.
Attach the colored pearls along the butterfly body.

I've LOVED creating and sharing the Painted Petals creations with you this week and although I love them all, I do have a favorite. Before I tell you which it is, here's a recap. Click the image to be taken to the post...


Ok, so my favorite is Tuesday's. I'd love to know which is yours?

Challenges...
#109 AG at 613 Avenue Create
#45 AG at Crafting From The Heart
AG at Through The Craft Room Door

All the products I've used to create today's card are available 24/7 in my Online Shop. Click the images below to be taken straight to them.

Built for Free Using: My Stampin Blog

Whatever you're doing this weekend, have a great one! I'll be back on Monday, so I hope you'll join me then!

Hugs,
Em

February 5, 2015

Emboss Resist With Painted Petals

Hi everyone,

Thanks for stopping by and for all your wonderful comments. I'm honored to have you here and I truly appreciate each of you more than you know!

I'm loving sharing Painted Petals week with you here. If you missed or would like to revisit the cards created so far, here they are: Monday, Tuesday, Wednesday. For today's card I've used one of my favorite techniques, emboss resist...


Card: Whisper White (folded base, panel and snippet for sentiment
Ink: Versamark, Blushing Bride and Strawberry Slush
Stamp sets: Painted Petals and Lotus Blossom (available FREE during Sale-A-Bration)
Tools and stuff: White Embossing Powder, heat gun, Bracket Label Punch and Stamping Sponges

Stamp the stems a number of times onto the panel in Versamark. Cover with White EP and heat.
Stamp the sentiment from Lotus Blossom in Strawberry Slush onto Whisper White and punch out. Sponge Blushing Bride ink around the edges.
Sponge Blushing Bride ink over the embossed panel. Stamp the flower heads in Strawberry Slush as desired (I didn't reink the stamp for some). Attach panel to folded base card.
Pop the sentiment up on the card using Stampin' Dimensionals

Challenges...
#162 at Pixie's Snippets
AG at Clear it Out Challenge
#109 AG at 613 Avenue Create

All the products I've used are available 24/7 in my Online Shop. Click the images below to be taken straight to them

Built for Free Using: My Stampin Blog

I'll be back tomorrow with the last of this week's Painted Petals creations, so I hope you'll join me then.

Hugs,
Em

January 26, 2015

Zingy Lotus Blossom

Hi everyone,

Thanks for stopping by and for all your wonderful comments. I'm honored to have you here and I truly appreciate each of you more than you know!

The Lotus Blossom stamp set from Stampin' Up! has been sat on my desk for almost a month and while I've used a few of the sentiments in the set on other cards, I've been a bit apprehensive of using the flower stamps! So totally silly, I know! All that changed this morning and I spent a few hours playing and you know what? I LOVE it!

I've seen so many great designs created with the set, but I thought I'd start of by creating a simple card using only the stamps in the set and a couple favorite punches...


Card: Whisper White and Tangelo Twist
Ink: Tangelo Twist and Pear Pizzazz
Tools: Bracket Label and Decorative Label punches

Stamp the three step blossoms onto a spare piece of Whisper White, stamping off once for the second and third layers and fussy cut (this is quicker than you might think!).
Stamp the two step stems onto the bottom of a panel of Whisper White and layer this onto a Tangelo Twist panel then onto the card base.
Attach the flowers with a few glue dots.
Stamp sentiment onto Whisper White and punch with the Bracket Label. Layer onto a Tangelo Twist Decorative Label and attach above the blossoms.

Challenges...

#108 AG at 613 Avenue Create
January Linky at DL.ART

All the products I've used to create today's card are available 24/7 in my Online Shop. Click the images below to be taken straight to them.

Built for Free Using: My Stampin Blog

I'll be back tomorrow with another Lotus Blossom creation, so I hope you'll join me then.

Hugs,
Em

January 22, 2015

Emboss Resist With Petal Potpourri

Hi everyone,

Thanks for stopping by and for all your wonderful comments! I'm honored to have you here and I truly do appreciate each of you more than you know!

I loved creating and sharing the emboss resist cards with you last week. So much so that I had to have a go with the Petal Potpourri stamp set too...


Card: Whisper White
Ink: Blushing Bride and Versamark
Stamp sets: Petal Potpourri and Tag Talk
Tools etc: White embossing powder, Bracket Label Punch and Stamping Sponges

Stamp the image in Versamark randomly on a Whisper White panel, cover with White EP and heat. Stamp the sentiment in the same way onto more Whisper White and punch out with the Bracket Label Punch.

Sponge ink over both the embossed panels and attach to the card base.

Challenges...
AG at TTCRD
#107 AG at 613 Avenue Create
January AG at 3 Girl Jam

All the products I've used to create today's card are available 24/7 in my Online Shop. Click the images below to be taken straight to them.

Built for Free Using: My Stampin Blog

I'll be back tomorrow with the last of this week's Petal Potpourri creations, so I hope you'll join me then.

Hugs,
Em

January 21, 2015

Zingy Refresh Renew Rejoice

Hi everyone,

Thanks for stopping by and for all your wonderful comments. I'm honored to have you here and I truly appreciate each of you more than you know!

We've reached the middle of Petal Potpourri week and if you're feeling tired today's zingy, zesty colors, together with the beautiful sentiment from the Indescribable Gift stamp set from Stampin' Up!, will hopefully give you a boost...


Card: Whisper White, Tangelo Twist and Hello Honey
Ink: Tangelo Twist and Hello Honey
Markers: Tangelo Twist and Hello Honey (from 2014-2016 In Color Stampin' Write set)
Stamps: Petal Potpourri and Indescribable Gift
Tools: Bracket Label Punch

Stamp the two smallest stamps from the Petal Potpourri set randomly onto a Whisper White panel, (I started with the flower shape and filled in the gaps). Attach to Tangelo Twist panel.

Scribble the Hello Honey marker all over the sentiment stamp, then carefully go over the bottom half of the letters with the Tangelo Twist. Huff on the stamp to moisten if needed and stamp onto Whisper White. Punch out with the Bracket Label and attach to one punched from Hello Honey. Attach to card.

Challenges...
#183 Color it at HIMRC
#123 AG at Aud Sentiments
#167 AG at Word Art Wednesday

All the products I've used to create today's card are available 24/7 in my Online Shop. Click the images below to be taken straight to them.

Built for Free Using: My Stampin Blog

I'll be back tomorrow with another Petal Potpourri card using one of the other stamps in the set, so I hope you'll join me then.

Hugs,
Em

January 20, 2015

Birthday Card With Petal Potpourri

Hi everyone,

Thanks for stopping by and for all your wonderful comments! I'm honored to have you here and I truly appreciate each of you more than you know!

Regular readers might recall how much I love creating my own backgrounds and also using the Blendabilities markers from Stampin' Up! Today's card is created using both those techniques, with the new Petal Potpourri stamp set...


Card: Whisper White and Lost Lagoon
Ink: Lost Lagoon and Pool Party
Markers: Coastal Cabana Blendabilities
Stamp sets: Petal Potpourri and Tag Talk
Tools: Flower Medallion and Bracket Label punches

Stamp the flower image from Petal Potpourri randomly onto a panel of Whisper White and once onto a spare piece. Adhere panel to folded card base. Color the additional one with the lightest shade of Coastal Cabana Blendie and punch out.

Stamp the sentiment from Tag Talk on Whisper White and punch out. Punch piece of Lost Lagoon card and layer together.

Attach sentiment and flower to card using Stampin' Dimensionals.

Challenges...

#130 Friend at CASology
#123 AG with a twist at Artistic Inspirations
#129 Birthday for a girl at Brown Sugar

All the products I've used to create today's card are available 24/7 in my Online Shop. Click the images below to be taken straight to them.

Built for Free Using: My Stampin Blog

I'll be back tomorrow with another, very different card using the Petal Potpourri stamp set, so I hope you'll join me then.

Hugs,
Em

December 31, 2014

Thank You With Beautiful Wings

Hi everyone,

Thanks for stopping by and for all your wonderful comments. I'm honored to have you here and truly appreciate each of you more than you know! I hope you had a great Christmas and received everything you wished for!

Today's card is perfect for sending after Christmas and it's also my Guest Designer contribution for challenge #21 over at Mrs. A.'s Butterfly Challenge, following my win in Challenge #18. Thanks again Mrs. A. for such an honor!

I've used a few of my favorite things to create the card, the Beautiful Wings Embosslit, Woodgrain embossing folder and Work Of Art stamp set, together with the Bracket Label punch from Stampin' Up!

I've also used a favorite technique for the design that I've not done for a while, white on white, or in this case Very Vanilla on Very Vanilla. The sentiment is embossed in gold and I love the look


Challenges...
#21 Thank you with butterflies at Butterfly Challenge
#180 Freestyle at Hiding In My Craft Room
#147 Happy New Year/ Thank you at DL.ART
AG at Through The Craft Room Door

All the products I've used to create today's card are available 24/7 in my Online Shop. Click the images below to be taken straight to them.

Built for Free Using: My Stampin Blog

Thanks again for all your support this year! I wish you and your families a very Happy New Year! See you in 2015! :)

Hugs,
Em

November 10, 2014

Perfect Blend #2

Hi everyone,

Thanks for stopping by and for all your wonderful comments. I truly do appreciate each of you more than you know!

This post is one I've scheduled due to my internet only being connected today in my new apartment, although I'm hoping that by the time it goes live I'll be back online!

Today's card is the second of two created using the Perfect Blend stamp set, the other can be seen here.


Both cards follow a similar recipe...
Colored base card folded tent style ~ Cherry Cobbler here
Very Vanilla panel stamped with 2 of the Gorgeous Grunge stamps
Perfect Blend stamped on Very Vanilla and pieced with base color
Tag Talk sentiment stamp punched with the Bracket Label

For this card I stamped the background in Crumb Cake and the coffee cups and sentiment in Rich Razzleberry

All the products used are available 24/7 in my Online Shop. Click the images below to be taken straight to them.
Built for Free Using: My Stampin Blog

If everything has gone to plan with the move I'll be back tomorrow with another card and perhaps some pix of the new apartment, so I hope you'll join me then.

Hugs,
Em x

November 7, 2014

Perfect Blend #1

Hi everyone,

Thanks for stopping by today and for all your wonderful comments. I truly do appreciate each of you more than you know!

I'm moving house this weekend and will be in great need of coffee to sustain me! I absolutely LOVE the Perfect Blend stamp set from Stampin' Up! and it's so appropriate for this weekend. So much so that both this post and Monday's, which I'll schedule for publication due to my internet being reconnected that day, are created using it...


Both cards follow a similar recipe...
Colored base card folded tent style ~ Lost Lagoon here
Very Vanilla panel stamped with 2 of the Gorgeous Grunge stamps ~ Crumb Cake and Lost Lagoon inks used here
Perfect Blend stamped on Very Vanilla and pieced with base color
Tag Talk sentiment stamp punched with the Bracket Label

All the products used are available 24/7 in my Online Shop. Click the images below to be taken straight to them.
Built for Free Using: My Stampin Blog

I'll be back on Monday with the scheduled post. Whatever you're doing this weekend, have a great one!

Hugs,
Em